
SPEED’S 95” TWIN CAM KIT
American IronPart 2: Finishing up the top end & doing the dyno runs
American Iron Magazine July 2006, Issue 210
Ready to see how we finish installing Speed’s 95” Stage 3 kit for Twin Cams? Last month, we did the gearcase section of the motor,
as we usually do, which means it’s time to bolt on the top end.
The starts of this build are the R&R Cycle cast aluminum heads built for Speed’s Performance. These heads are matched to Speed’s special grind camshafts and fitted with a special R&R Cycle valve spring combo. They are ported to flow with a lot of velocity in the lower rpm range, which makes the engine rev up very fast, and that’s on the pump gas. Coupled with Speed’s intake system, these heads allow a Twin Cam to draw in gobs of air down low, as well as at high rpm. Speed’s crank vent systems also helps to relive bottom end pressure, which allows an engine to rev up faster, and eliminates oil blow-by.
Though this may come as a surprise to some of you, even our plans sometimes go awry. It seems the bike we did the build story on was not available for the dyno runs as planned. We did this build in Daytona during Biketoberfest and then gave the bike back to the owner so he could break in the engine as per Speed’s procedure. The plan was for me to get it back from the owner during Bike Week to bring it to the Boot Hill Saloon front lot, which is where Speed’s is always set up in Daytona, and do the dyno runs to complete the story. But, as I said, that didn’t happen, though it was not the bike owner’s fault. So we defaulted to Plan B, which was for me to test ride and dyno Speed’s test mule, which was fitted with the same 95” kit. However, since I didn’t get to watch this engine go together we later pulled the front head off, so I could measure the engine’s bore and stroke to confirm that it was indeed a 95” engine. Since the cams, pistons, and heads are all of Speed’s design and supplied by him, whatever sized they were in the original motor was as per what Speed told me anyway, so there was no need to get crazy and check dome sizes, lifts, etc.
Ready for a few tips and tricks that should make the job go smoother? When adjusting the lifters, don’t forget to wait at least 10 minutes for the lifters to bleed down before rotating the engine to do the other cylinder’s lifters. Also, before installing the Mikuni carb, Jamie swapped the Mikuni’s choke cable for the stock CV choke cable. However, he used the Mikuni cable’s spring and plunger with the CV choke cable. Finally, when installing the exhaust, first put everything on loosely. Then go back and tighten everything up, starting at the heads and working your way back. If you have to force something to line up, or to close a gap, shim it to fit. Do not force it into place or it will crack later on.
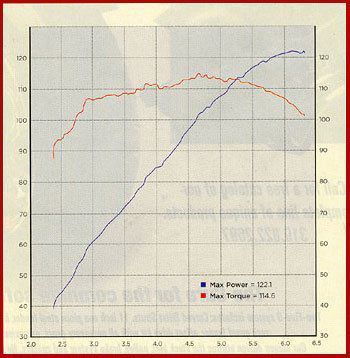
One more thing: To get the power numbers shown in the dyno sheet, Speed, who is a very experienced tuner, had to spend quite a bit of time dialing in the ignition and carb jet settings. An average tuner can expect to get lower power numbers, about 105-112 hp. Also, you must use a performance exhaust system – like a Hooker or D&D 2-into1 – with this kit to realize its full potential. That said, check out the accompanying photos to see what Jamie Hanson and Jimbo did to install the top end and the dyno chart for how this impressive engine ran.

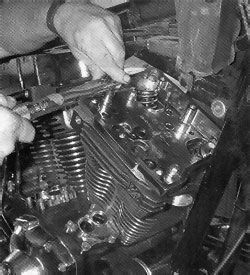
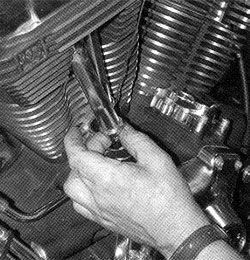
1. Our opening shot shows where we left off last month: The cam and lifter covers have been reinstalled. Jimbo has also checked the cylinder studs, and they are within spec and reusable.
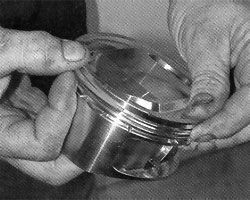
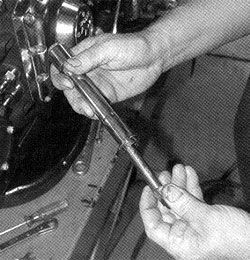
2. After the cylinders are bored, washed, and lubed, the end gap of the piston’s compression rings is checked using a flat feeler gauge. Jimbo wants a gap of 0.014”-0.019” for this 95-incher.
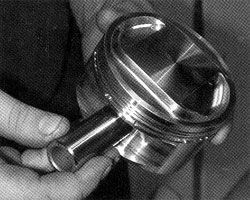
3. After inserting a wrist pin clip into one side of the piston and lubing the wrist pin, Jamie slips the pin part way into the piston. Jim also installs the dowel in the cylinders.
4. The rings are then installed onto the piston, according to the ring manufacturer’s instructions. Make sure the dots are/or chamfers are positioned correctly, and that the end gaps are spaced as per spec.
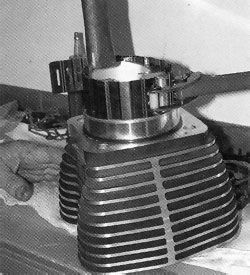
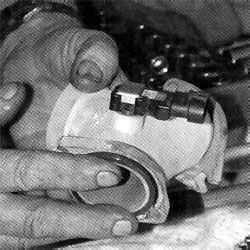
5. Using a ring compressor, Jimbo installs the assembled piston, with lots of lube on the piston and in the cylinder bore, into its cylinder just enough for the rings to be inside.
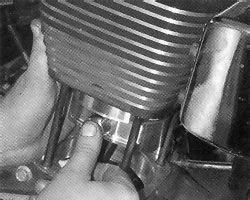
6. With a new O-ring on the base of the cylinder and the rag removed from the cases, the piston/cylinder is positioned over its connecting rod and the wrist pin sent through.
7. After putting the rag back into the case bore, Jamie installs the other wrist pin clip into the piston. The rag is then removed once more, so the cylinder can be pushed down onto the case.
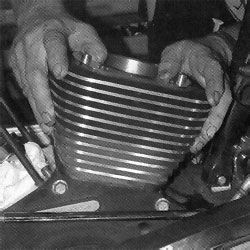
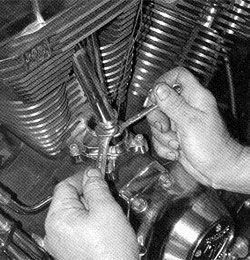
8. With a new head gasket on the cylinder, Jimbo bolts on the R&R Cycle head using a 12-point 1/2” socket. It’s torqued down as per Speed’s own procedure.
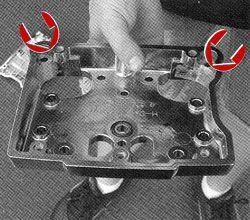
9. The lower rocker boxes have to be clearanced around both valve spring packs (arrows). You must have at least 0.030” clearance between the cover and the valve springs.

10. After putting a new gasket on the head, Jimbo bolts on the lower box using a 7/16” socket. He torques the hardware, with a little blue Loctite on the threads, to 144 in-lbs., as per the H-D sequence.

11. The stock rocker arms are then swapped out for a set of S&S roller rockers. Be sure you align the notch in the rocker shaft with the bolt hole on the right side of the support.
12. The complete rocker assembly can then be installed into the lower rocker box using a 1/2" socket. The stock hardware, with some blue Loctite on the threads, is torqued to 16 ft-lbs.
13. The stock oil breather assembly is bolted into the lower box, with a new foam element in it, using a 3/8” wrench. A little blue Loctite is used on the bolt threads.
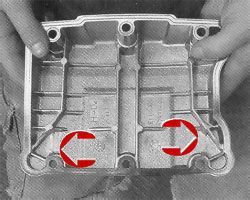
14. The top rocker box cover must also be clearanced for the larger valve spring pack. Do this by removing these two web ridges (arrows). It’s then installed onto the engine with a new gasket.
15. After he puts new O-rings in the heads, lifter cover, and pushrod tubes, Jimbo puts the new Rivera Taperlite pushrods into their tubes.
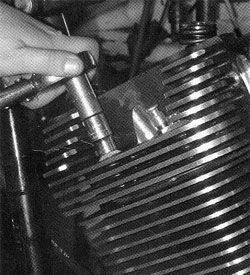
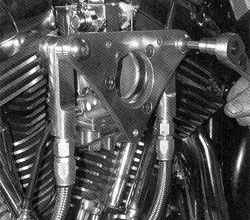
16. After fully compressing the pushrods, they and their tubes can be installed onto the engine. There are two intake (shorter/blue) and two exhaust (longer/red) pushrods.
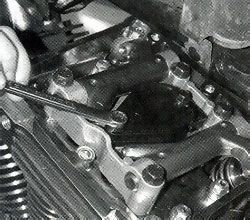
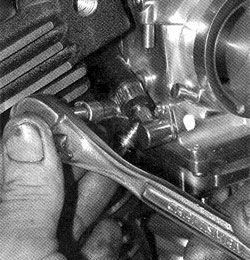
17. After rotating the engine so that the lifters are at their lowest point for the cylinder he’s working on, Jimbo adjusts the pushrods, as per Rivera’s specs, using a 5/16” and two 1/2" wrenches.
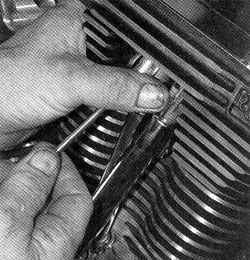
18. Once all the pushrods are installed and adjusted to spec, the top clips can be snapped into place using a flat-bladed screwdriver.
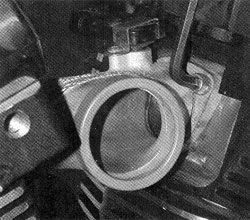
19. After swapping over the MAP sensor, Jimbo puts a little silicone sealant on the new seals before he slips them onto the Screamin’ Eagle manifold.
20. The new SE 44mm manifold is then bolted to the heads using a 1/4" ball-end Allen. Note: Use the Allen specially made for intake manifolds, since it’ll make the job a bit easier.
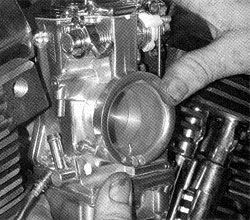
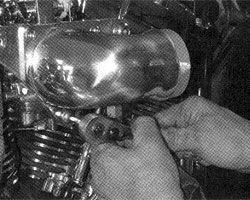
21. After hooking up the throttle cables and putting a new seal on the manifold, the new Mikuni 44mm carb is pushed onto the manifold by hand.
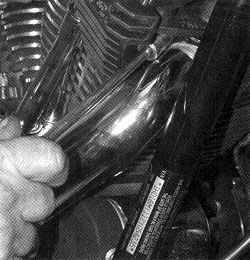
22. After installing new gaskets in the heads, Jimbo bolts up the exhaust system’s header pipes (this system came fully assembled) using a bit of finesse and 1/2” socket.
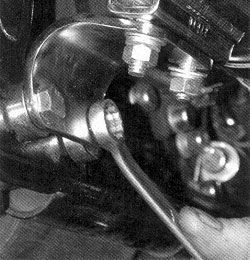
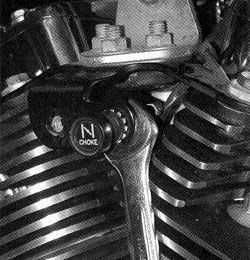
23. Once the top engine mount is reinstalled, Jamie bolts the Mikuni carb’s choke cable to it using an 11/16” wrench.
24. Jimbo finishes the exhaust install by bolting up the system’s muffler to the stock exhaust mount using 1/2" and 9/16" wrenches. He uses a 5/16" for the heat shields.
25. Once the NGK spark plugs are installed, Jamie pops on a set of Speed’s own 40-ohm spark plug wires for high performance engines.

26. Jimbo then hooks up the fuel line from the stock CV carb to the new Mikuni using a set of clamps and a 1/4" socket.
27. Jamie finishes the ignition upgrade by installing a new Daytona TwinTec module. He sets it to a conservative advance curve for the break-in period, and will adjust it as needed on the dyno later.
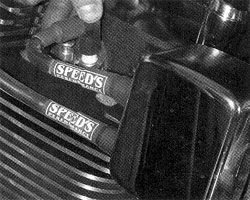
28. Jimbo starts installing the air cleaner assembly by bolting on the Speed’s backing plate, which comes complete with two Speed’s breather assemblies that go into the heads.
29. Speed’s 90-degree elbow is then bolted to the backing plate using the supplied hardware, with a little blue Loctite on the threads, and a 3/16" and 5/32" Allen.
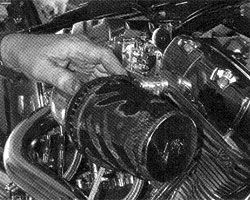
30. A K&N air filter gets attached to the elbow using the supplied clamp and a flat-bladed screwdriver, which finishes this installation.
DYNO RESULTS As you can see, 94 ft-lbs. of ...More
